MyHealthyVegas

Welcome! Sharing recipes, favorite foodie links and healthy living tips - Enjoy!

  • Home
  • Recipes
  • Vegas Eats
  • Healthful Links
  • About
You are here: Home / Archives for All Recipes / Entree

MyHealthyVegas Black-Eyed Pea Soup

January 1, 2026 by myhealthyvegas

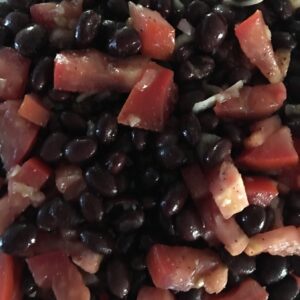
New Year’s Day 2026 is here and this holiday is rooted in tradition. On January 1, people observe long-standing rituals meant to bring good fortune for the year ahead. One of the most enduring is eating black-eyed peas.  It is believed to invite luck, wealth, and prosperity. If you want to start 2026 on a positive note, a pot of black-eyed peas is a simple and delicious place to begin.   This recipe will make up enough to freeze for enjoying later on.

I soaked the peas in 6 cups of water over night.  Rinsed them well in the a.m. and sorted out any bad peas.   I put peas and two bay leaves in the slow cooker while I prepped the veggies.

For the veggie prep I put 1 tbsp of olive oil in the bottom of a dutch oven.   I then added the onion, garlic, celery and carrots and simmered on medium heat.   Watch and stir frequently, ensuring garlic doesn’t burn.  The onions should be softened and garlic fragrant.   The slow cooker will take care of the carrots and celery during cook time. Before combining with peas in slow cooker I added spices to the veggie mix.


Veggies were added to the peas in the slow cooker along with chicken broth and water.  I also added a package of Smithfield® chopped ham and gave everything a good stir. Slow cooker was set to high for 3 hours originally.

I tested the peas at 3 hours and found the peas and carrots too firm for my liking.  I added one more hour.  The final result – perfect!  Happy New Year!!

If you do not have one of these for freezing soup, sauce, broth, etc. – they are on Amazon – called Souper Cubes.  They hold 2 cups with markings inside to tell you how much.   With broth and marinara,  I freeze them in 1/2 cup cubes and then transfer the cubes to a freezer bag to free up my blue cubes for the next use.


MyHealthyVegas Black-Eyed Pea Soup
 
Save Print
Prep time
9 hours
Cook time
3 hours
Total time
12 hours
 
Welcome in the new year with lucky black-eyed pea soup!
MyHealthyVegas: MyHealthyVegas
Serves: 8 servings
Ingredients
  • 1 lb black-eye peas (soaked overnight, rinsed)
  • 3 cups low sodium chicken broth
  • 3 cups water
  • ½ medium yellow onion, coarsely chopped
  • 1 clove garlic, minced
  • 8 baby carrots, coarsely chopped
  • 1 celery stalk, coarsely chopped
  • 1 tsp fresh thyme
  • 2 bay leaves
  • ½ tsp of Kosher salt
  • Fresh ground pepper to taste
Wordpress Recipe Plugin by EasyRecipe
3.5.3251


Filed Under: All Recipes, Entree, Soup

MyHealthyVegas Italian Chicken Soup

January 1, 2026 by myhealthyvegas

Fall is around the corner and making a batch of chicken soup for work day lunches sounded appealing.  I found a series of chicken soup recipes and one in particular fit into my WW daily blue points quota.  I have never tried an Italian seasoned soup.  I can tell you the house smelled AMAZING the entire day the slow cooker was doing its thing!

First step is to add seasoned chicken breast (tendon removed), diced tomatoes, chicken broth, yellow onion, orange bell pepper, pressed garlic, Italian seasoning, and bay leaf the slow cooker. Cover and cook on High until the chicken is tender (3 hours). 

Next remove the chicken and the bay leaf.  You can shred the chicken to your liking after 10 minutes of cooling.

While chicken is cooling add pasta into the mixture in the slow cooker.  Be sure to stir to incorporate the pasta and make sure it is fully covered with liquid.  Cover the slow cooker and cook on High until the pasta is tender (30 minutes).  If you are not going to be eating this right away and reheating individual portions, you may want to make the pasta a little al dente.  Start by testing it after 25 minutes.

Add shredded chicken and chopped basil to slow cooker.  Stir the ingredients to incorporate and allow the chicken to warm back up.   You can serve immediately or let it cool off a bit before portioning it out.    When serving you may garnish with Parmesan cheese. If you can spare the carb intake a crusty bread would be awesome with this hearty soup.

Variations:  To reduce carbs and point values, double the chicken and cut the pasta to 2 cups.


MyHealthyVegas Italian Chicken Soup
 
Save Print
Prep time
15 mins
Cook time
3 hours 30 mins
Total time
3 hours 45 mins
 
MyHealthyVegas: MyHealthyVegas
Serves: 6
Ingredients
  • 1 lb chicken breast, skinless, boneless and tendon removed
  • 1 can diced tomatoes, Italian seasoned preferred
  • 4 cups low-sodium chicken stock
  • ½ yellow onion, chopped
  • 2 orange bell peppers, chopped
  • 4 cloves garlic, minced
  • ¼ tsp salt to season chicken
  • ½ tsp black pepper to season chicken
  • 1 bay leaf
  • 2 cups of whole wheat pasta (farfelle, rotini, penne)
  • 2 tbsp fresh basil, finely chopped
Wordpress Recipe Plugin by EasyRecipe
3.5.3251

Filed Under: All Recipes, Entree, Soup

MyHealthyVegas Wedge Salad with Crab

January 1, 2025 by myhealthyvegas

The New Year always makes me crave crab.  Alaskan Crab is by far my favorite seafood.  I have been thinking about an iceberg wedge salad with lump crab but could not figure out what dressing I should use.   After searching the web I found some inspiration an made a lovely little wedge salad to compliment by steak dinner for New Years!

First off, let me present the stars of the salad dressing.  I opted to go with a little more fresh lemon juice and slightly less white wine vinegar in my recipe.  This dressing really mellowed nicely the second day.


Next we have our primary Stars.  Or rather the essentials to a wedge salad with crab!   I prefer Roma tomatoes but you could really use whatever you prefer.  I removed the seeds from mine and chopped them coarsely.


Does this not look so fresh and light.  Great paired with a steak or salmon filet!


How to put it together you say?  Well let us make the dressing first so we can let it chill while we prepare the salad.

Dressing

  • 1 garlic large clove, pressed
  • 1 lemon, juiced
  • 2 teaspoons Dijon mustard
  • 1/2 tablespoon sugar (honey could be substituted)
  • 2 1/2 tablespoons white wine vinegar
  • 2 tablespoons reduced fat mayonnaise with avocado oil
  • 2/3 cup extra virgin olive oil
  • salt and pepper to taste

Whisk all of the dressing ingredients together and store in a container until ready to use. Okay to store in the refrigerator, but you will need to whisk it again prior to use.  I found that keeping extra dressing in the refrigerator in a small sealed container that allowed me to shake it to remix worked perfectly.

Salad (makes 4 small salads)

  • 1 head of Iceberg lettuce
  • 2 Roma tomatoes
  • 8 oz of Crab meat

Peel off outer leaves of the lettuce, chop off stem and cut lettuce in to 4 wedges.  Slice the Roma tomatoes, de-seed them, and cut in to 8 slices.  Coursely chop 2 slices for each salad plate.  Place 1 quarter of the lettuce on a salad plate or bowl, as well as of the tomatoes.  Each salad plate should be topped with 2 oz of crab meat.  Drizzle 2 tbsp of freshly whisked dressing on top and enjoy!  Feel free to add more dressing if you prefer.  I am counting WW points so I tend to go light.

A couple of additions worked out great:  marinated Kalamata olives and a slice of seasoned toasted baguette.


My inspiration for the salad dressing can be found on  Fraiche Living.

Need to explore their site some more.  So many delicious ideas!!


Filed Under: All Recipes, Entree, Side Dish

MyHealthyVegas Cowgirl Caviar

December 30, 2024 by myhealthyvegas

I was looking for something new to make for New Years Day that included black eyed peas.   Somehow I came across different recipes for Cowboy Caviar using the peas.    I made a few adaptions to create something I would enjoy.  If you wanted to make this for a larger group you could double the ingredients.  You can also add black beans to the mix in addition to the black eyed peas.   If you like more heat then adjust the amount of jalapeño to your liking.


The star ingredients!

The finished product!


Here is how it comes together.

MyHealthyVegas Cowgirl Caviar on a Budget
 
Save Print
Prep time
15 mins
Cook time
30 mins
Total time
45 mins
 
A spin on the cowboy caviar classic that uses black eyed peas.
MyHealthyVegas: MyHealthyVegas
Serves: 4
Ingredients
  • 1 15.5 oz can Black Eyed Peas (rinsed and drained)
  • 1 cup Fire Roasted Sweet Corn (if using frozen heat per package instructions)
  • 1 lg coarsely diced Orange Bell Pepper
  • 1 tbsp diced Jalapeño Pepper (more or less to taste)
  • 1 lg finely diced Shallot (or red onion if you prefer)
  • 1 tbsp fresh Lemon Juice
  • 1 tsp Honey or Sugar
  • 1 tbsp Dijon Mustard
  • ⅛ cup Extra Virgin Olive Oil
  • 1 tbsp Red Wine Vinegar
  • ½ tsp Kosher Salt
  • ¼ tsp Ground Black Pepper
  • ½ tsp dried Italian Seasoning
  • TOSTITOS® Scoops (tortilla chips) for serving
Instructions
  1. In a medium glass bowl add rinsed and drained black eyed peas, bell pepper, jalapeño pepper, corn and shallot.
  2. In a small bowl or measuring cup combine the olive oil, mustard, vinegar, lemon juice, honey, Italian spice, salt and black pepper. Whisk well to combine and then pour on the main ingredients. Stir well to combine. Cover with plastic wrap and chill in the refrigerator for at least 30 mins. This gets better with time.
  3. When ready to serve remove from refrigerator and serve with chips. Enjoy! Any leftovers can be covered and returned to the refrigerator. Used within 3 days. This is also really good as a side dish to tilapia.
Notes
My best estimate is this is WW 2 points. (For oil & honey)

Recipe by MyHealthyVegas. Please do not post or reprint this recipe without my permission. If you'd like to feature this recipe on your site, please rewrite the method of preparation and link to this post as the original source.

My Recipe Inspiration:
The original recipes I found were Texas Caviar by Food and Wine and The Southern Lady Cooks Cowboy Caviar
Wordpress Recipe Plugin by EasyRecipe
3.5.3251


Filed Under: All Recipes, Entree, Side Dish

MyHealthyVegas Shrimp & Asparagus Flatbread Pizza

July 3, 2021 by myhealthyvegas

I have been experimenting with this recipe for years now.   I found this really interesting  7-grain flatbread pizza crust at Sprouts recently.   Here is my latest adaptation of MHV Shrimp & Asparagus Flatbread Pizza.

Same assembly of ingredients as my original pizza.   The package has two crusts in it and you can refrigerate once opened.  This flatbread requires no pre-cook like the Pillsbury version.    Ready to head to the 400 degree oven topped with The Laughing Cow cheese, cooked shrimp, green onion, asparagus, fresh basil from my garden and Parmesan cheese.

Crust instructions said to cook till ingredients melt and crust is to your liking.  I found that 10 mins was a bit long so the second crust I cooked for 8 mins but it depends also on your oven.  A drizzle of balsamic glaze and it is ready to slice and serve.   I refrigerated the extra slices and warmed them up slowly in the toaster oven for repeat meals.  A serving is 1/4 of the pizza.


Revised MHV Shrimp & Asparagus Flatbread Pizza

MyHealthyVegas Shrimp & Asparagus Flatbread Pizza
 
Save Print
Prep time
15 mins
Cook time
10 mins
Total time
25 mins
 
The latest revision of my shrimp and asparagus pizza.
MyHealthyVegas: MyHealthyVegas
Serves: 4
Ingredients
  • 12 medium size frozen raw shrimp, peeled, tails removed, deveined
  • 4 wedges The Laughing Cow® Light Creamy Swiss cheese
  • ¼ c shredded Parmesan cheese
  • 1 12" Flatzza 7-grain flatbread pizza crust
  • 18 baby asparagus tips and stems, cut at an angle
  • 6 chopped green onions
  • Handful of fresh chopped sweet basil from the garden
  • Balsamic vinegar glaze for serving
Instructions
  1. Preheat oven to 400 degrees. Spray a baking sheet with nonstick spray or line with nonstick aluminum foil.
  2. Bring a skillet sprayed with nonstick spray to medium heat. Add shrimp and season with grilled shrimp seasoning*. Stir until shrimp is cooked through, about 4 minutes. Remove from skillet and set aside.
  3. Add cut asparagus tips to skillet after shrimp is removed. Stir and cook for 4 minutes. Remove from skillet, chop shrimp and set aside.
  4. In a small bowl, combine cheese wedges and parmesan cheese. Mix until uniform.
  5. Place flatbread on prepared baking sheet.
  6. Spread cheese mixture over top of pizza, leaving a ½-inch border. Top with chopped shrimp, green onions, fresh basil and asparagus. (Extra Parmesan can be sprinkled on top)
  7. Place baking sheet into oven and bake until hot and lightly browned, 8-10 minutes. Check pizza after 8 minutes and adjust time accordingly.
  8. Remove baked pizza and slice into 8 slices (4 servings).
  9. Drizzle balsamic vinegar glaze over top of pizza and serve. Leftovers will refrigerate for 2 days. You can refrigerate with or without the glaze on.
  10. *Grilled Shrimp Seasoning –
  11. ½ tsp kosher salt
  12. ¼ tsp garlic powder
  13. ¼ tsp onion powder
  14. ¼ tsp ground black pepper
  15. ¼ tsp chili powder
  16. ¼ tsp granulated sugar
  17. /8 tsp cayenne pepper
  18. dash of ground allspice
Notes
Recipe by MyHealthyVegas. Please do not post or reprint this recipe without my permission. If you'd like to feature this recipe on your site, please rewrite the method of preparation and link to this post as the original source.
Wordpress Recipe Plugin by EasyRecipe
3.5.3251


Filed Under: All Recipes, Entree, Pizza

MyHealthyVegas Damson Plum Glazed Pork Tenderloin

July 3, 2021 by myhealthyvegas

In searching for the perfect Easter dinner I found a few  inspirational recipes for pork tenderloin.  One that really appealed to me was by Chef Famie in Famie’s Adventures in Cooking recipe book.  He called the recipe Roasted Pork Loin with Damson Plum Glaze.    I knew that a 5 lb. pork loin was too much food for our small gathering of 3 people.  I have very little experience cooking pork and felt more comfortable the the budget friendly pork tenderloin option.  I searched the web and found a recipe fairly similar Pork Tenderloin with Plum Sauce.  Both sauce recipes have elements of plum preserves, mustard, brown sugar and a fermented sauce.   The Taste of Home version has a great marinade that really helps the flavor and prevents the tenderloin from drying out.

I had already ordered some Damson Plum Preserves off Amazon and wanted to use them.   Here is how I adapted the Taste of Home recipe for my meal.

MyHealthyVegas Damson Plum Glazed Pork Tenderloin
 
Save Print
Prep time
45 mins
Cook time
45 mins
Total time
1 hour 30 mins
 
Marinated pork tenderloin served with yummy Damson plum sauce. Perfect for a special occasion and budget friendly!
MyHealthyVegas: MyHealthyVegas
Serves: 6 servings
Ingredients
  • Marinade
  • ½ c Apple Juice (light/low calorie)
  • ½ c Soy Sauce (low sodium)
  • 2 Garlic Cloves, minced
  • 1 tbsp Organic Stone Ground Mustard
  • 1 tsp Dried Thyme
  • 1 tsp Ground Ginger
  • 1 pork tenderloin(1 lb) - there is enough for 2 if you want more
  • Damson Plum Sauce
  • ¾ c Damson Plum Preserves
  • ¼ c Shallot, very finely chopped
  • 2 tbsp Brown Sugar
  • 2 tbsp Apple Juice (light/low calorie)
  • 2 tbsp Soy Sauce (low sodium)
  • There was plenty of sauce for 1 tenderloin, for 2 it would have been just the right amount.
Instructions
  1. Whisk together all the marinated ingredients in a small bowl. Pour the mixture into a measuring cup. Place pork tenderloin in a zip-lock bag and pour ¾ c of the marinated into the bag. Reserve the remaining marinate in the refrigerator for basting later during cook time. Carefully let out the excess air from the zip-lock bag, seal and roll the tenderloin in the mixture. Place bag in refrigerator for at least 2 hours. Turning once if you can during that time.
  2. Preheat over to 425. Use a roasting pan with a shallow rack. Spray rack with Pam non-stick spray. Add just enough water to the bottom of the roasting pan to cover. You'll use this when basting later. Remove tenderloin from bag and discard used marinade and baggie. Place tenderloin on the rack. Place in oven and bake 40-45 mins or until the internal temp is 160. Baste every 10 mins. with reserved marinade from refrigerator.
  3. About 10 mins. before the meat is done cooking begin the sauce. Add all ingredients to a small sauce pan. Bring to a boil and then reduce to simmer.
  4. Remove tenderloin from oven when cooked and let it rest for 5 mins. Carve and place on serving plate. Drizzle sauce over meat for presenting to guests. Enjoy!
Notes
Recipe by MyHealthyVegas. Please do not post or reprint this recipe without my permission. If you'd like to feature this recipe on your site, please rewrite the method of preparation and link to this post as the original source.

My Recipe Inspiration:
Pork Tenderloin with Plum Sauce
Nutrition Information
Serving size: 3 oz
Wordpress Recipe Plugin by EasyRecipe
3.5.3251


Filed Under: All Recipes, Entree

MyHealthyVegas Spicy Strawberry Salsa

July 3, 2021 by myhealthyvegas

This is the perfect summer salsa for chicken, fish, and tortilla chips!  Just a few ingredients, a little chopping, a little time in the fridge and ready to eat.

The star of course is the strawberries.  These are hulled and coarsely chopped.

Next up is chopping/dicing the shallot, red bell pepper, cilantro and jalapeño pepper.  I prefer the milder taste of shallot over red onion.  It is also much easier to finely dice so that it doesn’t take away from the main star strawberry.


Combine all ingredients in a medium container that has a lid so that it is ready to in the refrigerator after.  Stir so that the salt, honey and lime combine with the chopped/diced ingredients fully.


If I am using the salsa for dinner then I try to get it ready and into the fridge around lunch time so that all the flavors have plenty of time to mingle.

I like to serve on grilled tilapia.   Shown here with tilapia, MHV Spicy Strawberry Salsa and sweet corn with green chilies.


Enjoy!


MyHealthyVegas Spicy Strawberry Salsa
 
Save Print
Prep time
15 mins
Cook time
30 mins
Total time
45 mins
 
Easy summer salsa for fish, chicken or tortilla chips.
MyHealthyVegas: MyHealthyVegas
Serves: 4-5
Ingredients
  • 2c Strawberries, hulled and chopped
  • ¼c to ½c finely chopped cilantro (amount according to taste)
  • 1 medium chopped red bell pepper
  • 1 medium to large diced jalapeno pepper
  • 1 medium finely diced shallot
  • 2 pinches of kosher salt
  • 1 squeeze of honey
  • ½ squeezed fresh lime
Instructions
  1. Combine all ingredients in a medium bowl.
  2. Stir to combine.
  3. Refrigerate at least 30 minutes prior to using to allow flavors to join. The longer the better.
Notes
My best estimate is this is WW Blue 1 point. (For honey)

Recipe by MyHealthyVegas. Please do not post or reprint this recipe without my permission. If you'd like to feature this recipe on your site, please rewrite the method of preparation and link to this post as the original source.

My Recipe Inspiration:
The original recipe uses red onion and twice as much cilantro. I adapted it for my tastes from 5-Ingredient Strawberry Salsa.
Wordpress Recipe Plugin by EasyRecipe
3.5.3251

Filed Under: All Recipes, Entree, Side Dish

MyHealthyVegas Black Bean and Tomato Salad

December 22, 2020 by myhealthyvegas

I love that WW has such a long list of Zero point foods!  Black beans and tomatoes are on the list!  The only WW Blue point for this recipe comes from the Extra Virgin Olive Oil.


MyHealthyVegas Black Bean and Tomato Salad
 
Save Print
Prep time
10 mins
Total time
10 mins
 
Quick to make and fresh tasting black bean and tomato salad. Serve chilled.
MyHealthyVegas: MyHealthyVegas
Serves: 4 Servings
Ingredients
  • 1 can Black Beans Low Sodium
  • 1 large course chopped Roma Tomato
  • 2 garlic cloves, crushed
  • 1 finely diced Shallot bulb
  • 1 tbsp Olive Oil, Extra Virgin
  • ¼ tsp Cumin
  • ¼ tsp Chili Powder
  • ⅛ tsp Black Powder
Instructions
  1. Rinse beans and put in small mixing bowl
  2. Combine all prepped ingredients
  3. Mix well and chill before serving
Notes
Recipe by MyHealthyVegas. Please do not post or reprint this recipe without my permission. If you'd like to feature this recipe on your site, please rewrite the method of preparation and link to this post as the original source.
Nutrition Information
Serving size: ½ cup
Wordpress Recipe Plugin by EasyRecipe
3.5.3251

Filed Under: All Recipes, Entree, Side Dish

MyHealthyVegas Bang Bang Shrimp

December 20, 2020 by myhealthyvegas

Here is my low-carb version of the classic.  Bang Bang Shrimp is breaded and deep fried, but the sauce is what makes it good.   So here it is with no breading and just the sauce served over riced cauliflower.

This is a single serving recipe for a quick lunch.  You can serve it over rice or my preference is to use riced cauliflower.


I thaw out some frozen, deveined, tail on, medium shrimp.  You can do raw just depends on how much time you have to fix lunch for one.  After a thaw I warm them up in a skillet sprayed with non stick cooking spray.  I add a little garlic powder and black pepper for seasonings.

Prepare the sauce, add the heated shrimp and mix well.

Add the steamed riced cauliflower, layer on the shrimp mixture, top with sliced green onion and/or slivered jalepeno peppers.

Enjoy!


MyHealthyVegas Bang Bang Shrimp
 
Save Print
Prep time
15 mins
Cook time
10 mins
Total time
25 mins
 
Carb friendly Bang Bang Shrimp
MyHealthyVegas: MyHealthyVegas
Serves: 1 serving
Ingredients
  • Sauce
  • 1 tbsp lite mayonnaise with olive oil
  • 1 tbsp Thai chili sauce
  • 1 tsp honey
  • ½ tbsp Sriracha
  • Shrimp
  • 12 medium shrimp peeled, deveined, cleaned (cooked or raw)
  • ⅛ tsp garlic powder
  • ⅛ tsp black pepper
  • Non-Stick cooking spray
  • Cauliflower
  • ½ cups steamed cauliflower rice
  • Garnish
  • 1 green onions sliced
  • Jalapeno pepper sliced to taste
Instructions
  1. Mix the sauce ingredient together in a bowl. Set aside.
  2. In a small skillet sprayed with non-stick cooking spray, add the peeled and cleaned shrimp.
  3. For cooked, season and saute for 4 minutes per side.
  4. For raw, season and saute for 5 minutes per side, or until no longer translucent.
  5. Put steamed riced cauliflower in a bowl, toss shrimp with the sauce and layer on top. Garnish with onions and/or jalapeno.
Notes
My best estimate on this is WW Blue 4 points.


Recipe by MyHealthyVegas. Please do not post or reprint this recipe without my permission. If you'd like to feature this recipe on your site, please rewrite the method of preparation and link to this post as the original source.

My Recipe Inspiration:
Recipe by MyHealthyVegas. Please do not post or reprint this recipe without my permission. If you'd like to feature this recipe on your site, please rewrite the method of preparation and link to this post as the original source.

My Recipe Inspiration: https://delightfullylowcarb.com/keto-bang-bang-shrimp/
Wordpress Recipe Plugin by EasyRecipe
3.5.3251


Filed Under: All Recipes, Entree

Myhealthyvegas Turkey Pot Pie

December 14, 2020 by myhealthyvegas

My favorite way to use leftovers from Thanksgiving is to create a turkey pot pie.  I typically have left over turkey, dressing, mash potatoes and gravy.   I then add some cooked frozen mixed veggies and we are good to go.

I layer the ingredients into a ready-made frozen pie crust.  I always prep my top crust before I start anything else.  It always takes longer than you think it should.

You will begin by layering your ingredients into a frozen ready made pie crust.   Here we have layered chopped turkey on top of dressing.

After pouring gravy onto the turkey and dressing layers, we add the cooked mixed vegetables.

Now we add the final ingredient of mashed potatoes before adding the top crust.

The top crust must be sealed and ventilated.

After cooking it is ready to serve

Enjoy!!!


Myhealthyvegas Turkey Pot Pie
 
Save Print
Prep time
40 mins
Cook time
40 mins
Total time
1 hour 20 mins
 
Leftover Thanksgiving turkey pot pie.
MyHealthyVegas: MyHealthyVegas
Serves: 8 servings
Ingredients
  • Marie Callender’s frozen deep dish pastry pie shells
  • 1 cup cooked dressing
  • 1 cup chopped, cooked turkey (white and dark meat)
  • ½ cup turkey gravy
  • 1 cup cooked mixed vegetables
  • 1 cup cooked mashed potatoes
  • White flour (for prepping top pie crust) A generously flour dusted rolling pin is very helpful here too.
  • Water for working the top pie crust
Instructions
  1. Set aside one shell for the top crust. Place that one shell from pan onto wax paper. You are going to allow it to thaw a bit until pliable, about 20 minutes.
  2. Place second shell in the tin on baking sheet.
  3. Preheat oven to 425° F.
  4. After 20 mins. work to flatten the shell on the wax paper into a smooth round form. You will need flour, water and lots of hand work to get it smoothed out. It should be slightly larger in circumference than your baking tin.
  5. Begin layering in filling in the shell in the tin. Here is the order bottom to top: Dressing – press this into the bottom of the pie,Turkey,Gravy – you want the gravy to soak through the turkey to the dressing. I like to keep a jar of pre-made gravy on hand in case I need more.Mixed veggies,Mashed potatoes.
  6. Once you have all the ingredients layered into the bottom pie shell, place thawed shell on top of pie. If you keep it on the paper and invert it over the filled crust it will be easier to handle. Seal it by crimping edge with a fork and/or fingers (remove excess dough if desired). Gently cut 4 - 1” slits in a star formation in the center to vent or use specialty pie crust cutters to create ventilation and beautify your pot pie.
  7. Place pie on baking sheet in center of oven according to your recipe. Bake 30 to 40 minutes or until crust is golden brown. Sometimes I back down the temperature to 400° F after 15 mins. depending on my oven. All your ingredients are pre-cooked so you need to focus on cooking the pie shell to 165° F. Everything inside just has to be heated through. I cover the edges of pie after allowing it to brown slightly after 15-20 mins. You can use a silicone pie edge cover or a strip of aluminum foil to cover while baking.
Notes
Recipe by MyHealthyVegas. Please do not post or reprint this recipe without my permission. If you'd like to feature this recipe on your site, please rewrite the method of preparation and link to this post as the original source.
Wordpress Recipe Plugin by EasyRecipe
3.5.3251


Filed Under: All Recipes, Entree

  • 1
  • 2
  • 3
  • Next Page »

Hi! Welcome and thanks for visiting MyHealthyVegas.com! Read More…

Copyright © 2026 · Foodie Pro Theme by Shay Bocks · Built on the Genesis Framework · Powered by WordPress